There is something about the end of a beach vacation that always feels a little abrupt. One moment you are listening to the rhythm of the waves and feeling the salt on your skin, and the next, you are back indoors, missing that effortless, breezy feeling.
This project is for those who want to keep that “endless summer” vibe alive a little longer. Inspired by Linda from It All Started with Paint, who used this idea to hold onto her childhood memories of the Jersey coast, this DIY fishnet gallery wall is a beautiful, tactile way to display your favorite beach moments.
It’s not just about hanging photos; it’s about creating a space that feels like a treasure washed ashore.
Fishnet decor with photos
What You Need
You don’t need much to recreate this look—just a little patience and a few simple materials:
Jute string (available at any local craft store).
A workspace where you can hang things up (it’s much easier than working flat).
Your favorite summer photos (square prints work beautifully here).
Mini clothespins or clips.
The Process: Knot by Knot
Making the net yourself adds such a personal touch. It’s a rhythmic process, almost like the tide coming in and out.
1. Set the Foundation
Start by cutting a length of jute to your desired width. String it up horizontally between two points. Linda found that gravity is your friend here—working vertically helps the net take shape naturally.
2. Prepare the Strands
Cut lengths of jute that are about 2½ times longer than the final length you want your net to be. Fold each piece in half over your horizontal “foundation” string so you have two equal lengths hanging down.
3. The Initial Loop
Create a simple loop and feed the two equal lengths through it, pulling them tight against the top string. Do this all the way across.
Starting the knots
4. Forming the Triangles
Now comes the weaving. Grab one string from a hanging pair, and one string from the neighbor next to it. Bring them together to form a triangle shape and knot them. Continue this all the way along the top row.
5. creating the Diamonds
For the next row, you repeat the process but shift it slightly. Grab a length of jute from opposite strings to form a diamond pattern. Knot them together. As you work your way down, row by row, that classic fishnet pattern will start to emerge.
Knotting the jute string
Bringing It to Life
Once your net reaches the length you want, the real magic happens. This is where you add your story.
Hang your finished net on the wall—perhaps over a wood panel for that boardwalk feel, or directly on a white wall for a clean, airy look. Then, use mini clothespins to attach your photos.
Don’t worry about perfect alignment. The beauty of this display is in its relaxed, organic nature. Mix in a few seashells, a piece of driftwood, or a starfish if you have them. Let your photos of sandy toes, ice cream cones, and sunsets breathe.
Close up of the weaving process
Every time you walk past it, you won’t just see a picture; you’ll feel a little bit of that summer sun all over again.
 Fishnet decor with photos
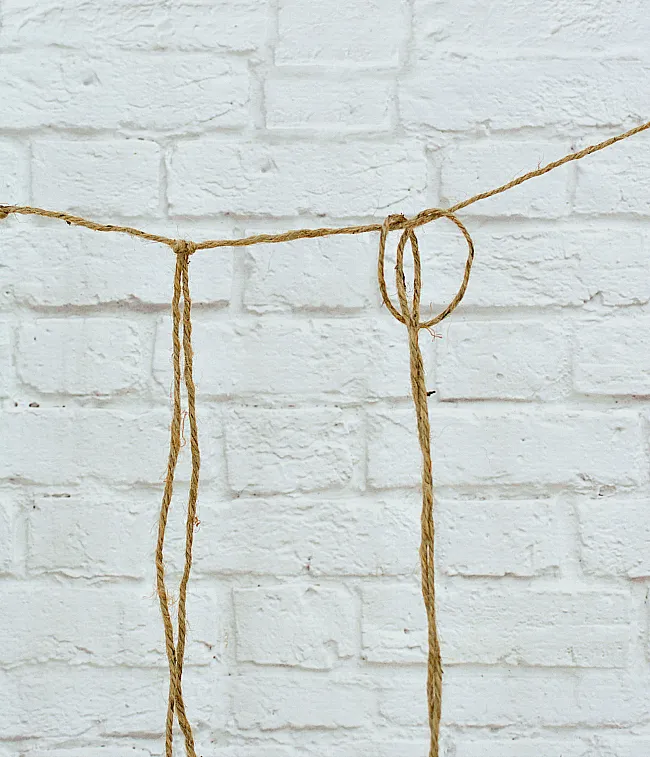 Starting the knots
 Knotting the jute string
 Close up of the weaving process


